8. Assigning More Material Properties to a Goblet
In this lesson, you will:
-
Use the specular and diffuse reflectivity options of the plastic shader.
-
Assign values to the refractive index of the plastic shader.
-
Assign values to the shininess option of the plastic shader.
-
Assign values to the extinction option of the plastic shader.
-
Experiment with various combinations of plastic shader options.
Open the goblet.g database using whichever method you prefer. Go to the Edit menu and select Combination Editor. Select basin1.r.
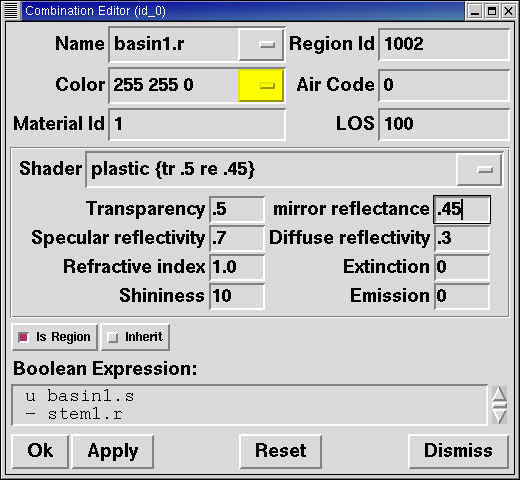
In the last lesson, we assigned values for two shader attributes-transparency and mirror reflectance. In this lesson, we will assign values for still other shader properties. When the plastic shader is selected for region basin1.r, eight attribute entry boxes currently appear in the Combination Editor. These boxes contain either the values that the user has previously set (e.g., those we previously set for transparency and mirror reflectance) or the default values that the raytracer will use if no others are specified. When any of these values is modified, the change can be seen in braces in the shader string box and in the appropriate attribute entry boxes, as indicated by the arrows in the following example:
|
Note that in |
In this example, the shader entry box indicates that the transparency (tr) is set at .5 and the mirror reflectance (re) is set at .45. The eight abbreviations currently used in the shader entry box are as follows:
tr - transparency |
sp - specular reflectivity |
ri - refractive index |
ex - extinction |
re - mirror reflectance |
di - diffuse reflectivity |
sh - shininess |
em - emission |
1. Specular and Diffuse Reflectivity
When light reflects off of a shiny surface, it produces two types of reflections. The most noticeable highlights are caused by specular reflectivity. The rest of the surface produces diffuse reflectivity. The shinier (or glossier) the surface is, such as on a crystal vase, the more specular reflectivity that is produced. The duller the surface is, such as with a wall painted with flat paint, the more diffuse reflectivity that is produced. A model of the relationship between these reflectivities is shown in the following illustration:
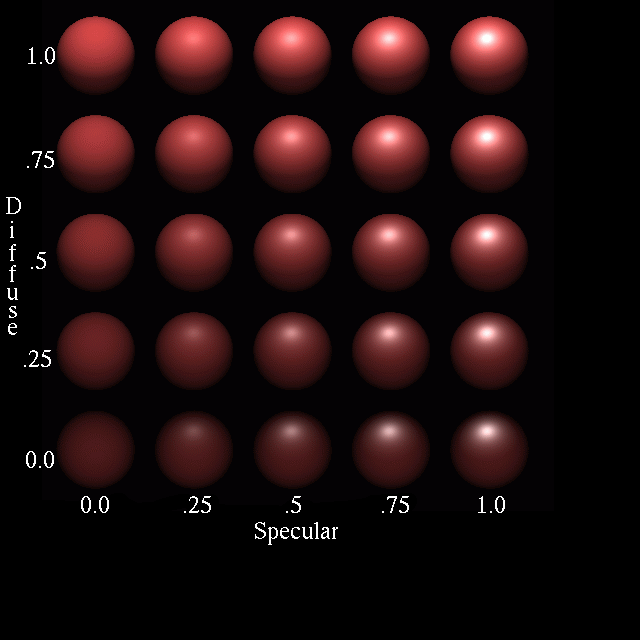
As seen in the illustration, diffuse reflectivity shows an object’s color by reflecting ambient light off the object. The upper left ball exhibits the maximum value for diffuse reflectivity (1.0), and as a result, its surface color is uniform.
Specular reflectivity, on the other hand, reflects the color of a light source. The lowest right ball, with the maximum value for specular reflectivity (1.0), shows a white light source being reflected off the surface of the ball.
The range for both specular and diffuse reflectivity is 0.0 through 1.0. However, combined values for these are typically equal to 1.0. Remember, if you are going to set values for one of these attributes, you need to assign a corresponding value to the complementary attribute so that the combination of the values equals 1.0.
2. Refractive Index
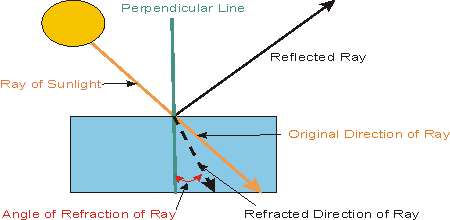
When light passes through one medium (e.g., air) into another medium (e.g., water), it bends from its original path. The degree to which the light bends is called the refractive index. The more dissimilar the media are, the greater the degree of refraction that will occur. For example, sunlight passing through a diamond will bend more than the same sunlight through optical glass. The diamond would have a higher refractive index (approximately 2.42) whereas optical glass would have a lower refractive index (approximately 1.71).
The range of index of refraction for MGED is 1.0 (the index for
air) or greater. This parameter is only useful for materials that
have a transparency greater than 0. The following drawing of sunlight
passing through water shows how refraction works.
3. Shininess
The shininess of an object affects the size of the specular component of the plastic shader. The shinier an object’s surface is, the smaller the reflection of the light source on the object’s surface will be. The range for shininess is typically an integer value from 1 to 10.
4. Extinction
The term extinction applies to the transmissive component of the plastic shader, and it indicates the amount of light absorbed by the object’s material. The default value is 0.0, and the range can be any nonnegative number. Using this attribute can dramatically impact other attributes of the shader, especially the refractive index.
5. Emission
Emission is a relatively new feature that has been added to the
BRL-CAD package. It concerns the amount of artificial
brightness of the object.
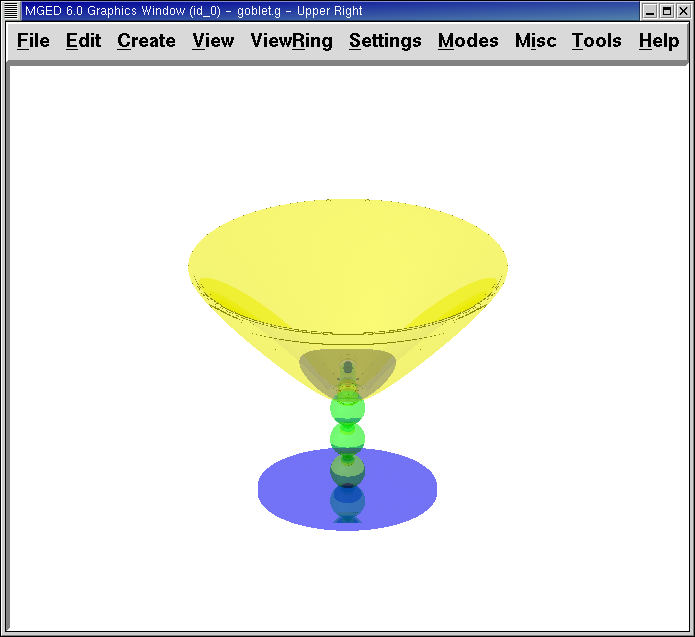
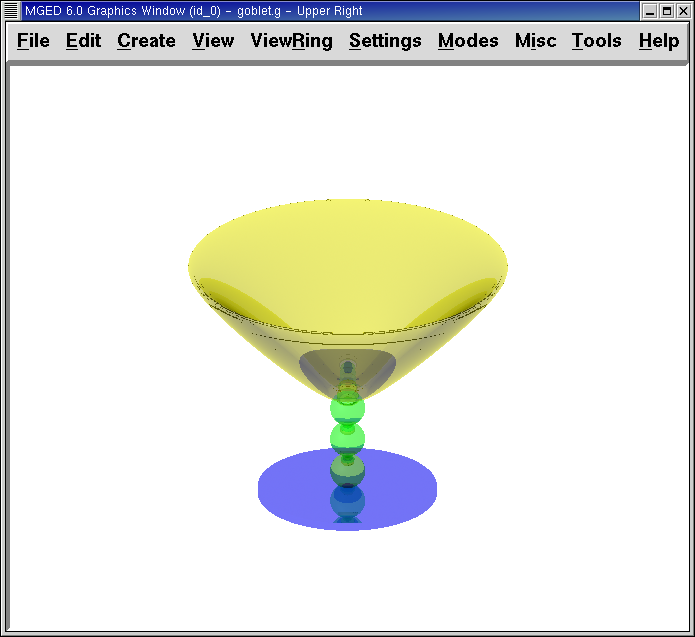
6. Applying Attributes of the Plastic Shader to the Goblet
Now that you understand the various attributes of the plastic shader, it is time to experiment with how they affect the final product-the goblet you created in the previous two lessons. You have already assigned values for transparency and mirror reflectance. Now add the attributes of specular reflectivity and diffuse reflectivity to basin1.r. Once you see how these two attributes affect your design, add the refractive index, then shininess and extinction. You might want to capture some of these changes so that you can refer to them later, when you are creating other models using the plastic shader. Remember to click Apply in the Combination Editor to actually incorporate the changes.
As you change the values for the attributes of the plastic shader, you will notice that some changes do not significantly alter the design. This is because there are a variety of ways to produce a particular look on an object. The following are two examples of the goblet with various values of the plastic attributes (which do create a noticeable difference) applied to basin1.r.
By the time you have finished experimenting with changing attributes of the plastic shader, your Combination Editor window might look something like this:
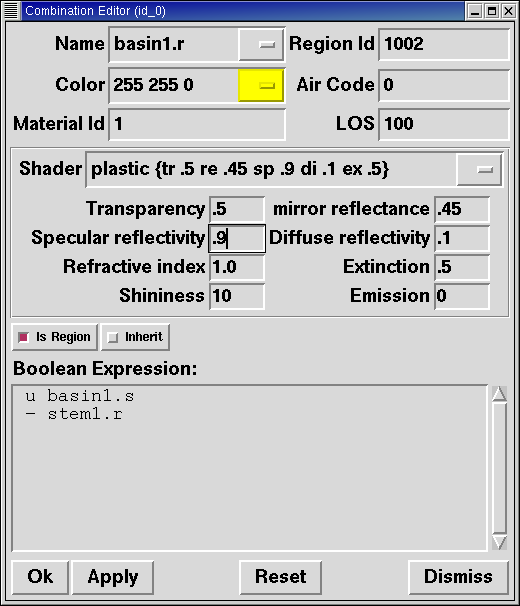
Notice that while the shader string entry box reflects the values set by the user in the attribute entry boxes (e.g., the Transparency of .5), it does not reflect the default values (e.g., the Shininess of 10).
7. Review
In this lesson, you:
-
Used the specular reflectivity and diffuse reflectivity options of the plastic shader.
-
Assigned values to the refractive index of the plastic shader.
-
Assigned values to the shininess option of the plastic shader.
-
Assigned values to the extinction option of the plastic shader.
-
Experimented with various combinations of plastic shader options.